

|
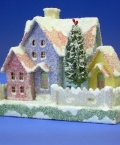
Note from Editor: This is another of our series of articles on building glitterhouses, replicas of those cardboard houses that were popular wintertime decorations in the mid-20th century.
These projects come to us courtesy of Florida designer Howard Lamey. Howard loves collecting and designing glitter houses, or as collectors call them, "putz" houses, from a German-American word related to "putter."
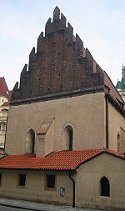 In 2008, I realized that, while every commercial Christmas village includes a church (or several), our little towns are universally missing another structure that is an important part of many communities - the synagogue. I suggested the project to Howard too late for last year, but he has come up with an attractive project for 2009. In 2008, I realized that, while every commercial Christmas village includes a church (or several), our little towns are universally missing another structure that is an important part of many communities - the synagogue. I suggested the project to Howard too late for last year, but he has come up with an attractive project for 2009.
The roof line of this project was inspired by internet images of oldest synagogue in Prague. Originally built in 1275, the structure is still used for worship today.
We hope folks will see this as a way of sharing our "best wishes" for the season and the coming year to everyone in our real communities.
If you like this structure and want to have an "all-season" version of it, there's no reason not to create a stone or brick version along the lines of the Stone Cottage project.
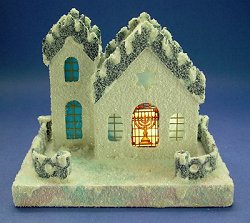 Building the Pine Mountain Valley Synagogue Building the Pine Mountain Valley Synagogue
When Paul suggested this project to me, I went looking for examples of synagogue architecture. The Prague "Old-New" Synagogue had such a distinct roofline, that I kept coming back to it.
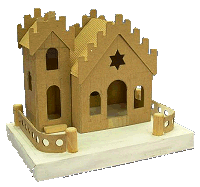
I confess that, at first, the roofline threw me a little. After making and installing the 4 trim pieces, I took another look at the images…the shape of the square top trim did not look quite right and needed to be trimmed at an angle. As a result, some of the photographs in this article show the trim square instead of angles. But the patterns and the final images show the revised, pointed shapes.
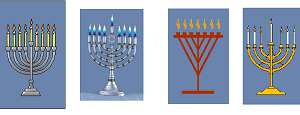
Also, the photographs show an image of a 7-candle minorah in the window, though Paul has promised to include graphics of a 9-candle minorah (for Hannukah celebrations) as well.
If you've built our beginning glitterhouse or any similar projects, you shouldn't have any huge problems with this one.
What You Will Need
Clean cardboard. For the building's walls, try to use something thick, but not corrugated, such as the backs of writing tablets. You'll probably want to use corrugated cardboard for the base, and maybe the foundations. In addition, for this project you'll need:
- A sharp mat knife or Xacto knife (or both)
- A stiff metal ruler
- Elmer's white Glue-All. A glue stick would also come in handy.
- Clear glitter. I use the “Sulyn” brand.
- Several sheets of acid-free, non-yellowing, white bond paper
- Cardboard that is "corrugated" on one side only (for the roof). I used card stock that came like this from an art supply store, but you can also use cardboard coffee-cup holders from a coffee shop.
- Flat white paint (flat latex interior wall paint is good) to prime the building (and give it the chalky feel of the original)
- Acrylic paint in the colors you plan to use
- "Vellum" or other transparent or translucent medium for printing the minora pattern (optional)
- Pale blue mylar or acetate sheet for the windows - I used a transparent "report cover" from an office supply (optional)
- Gold metallic marker/pen for drawing the mullions (windowframe pattern) (optional)
- Four 1 1/8” x 3/8” dowels for the fence posts
- Access to the Internet and a color printer
- Several spring-type clothes pins to hold things together as the glue dries.
Note: Our article on What You Need to Build Glitterhouses lists many other materials and tools that will help you work more quickly and efficiently.
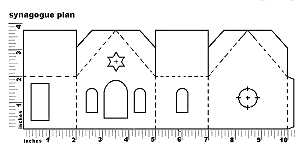
Print the Plans
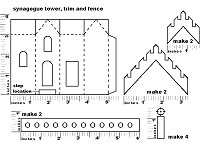
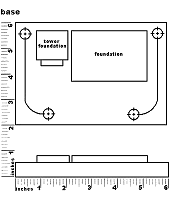
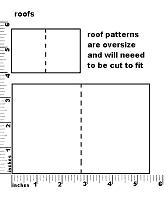
You can easily download the full-sized plans by clicking on the pictures above.
For each plan, select the print option, tell it to "auto rotate and center" or whatever else you need to do to make your printer go to Landscape mode. Don't select the "scale to page" or "shrink to fit" option. Print. When you get your printout, double-check the measurements with a ruler. I would recommend printing the menoras on plain paper first to check the fit of the one you like before printing on vellum. Also, the 9-candle menoras are suitable for Hannukah. If you want to build a "year-round" synagogue, you should probably choose a 7-candle menora.
Note: On some printers, a small portion of the image will disappear at the outside edge of the page. But you can easily "fill in the details" by looking at the mini versions above.
If you can't get these plans to work, contact
Paul and ask him for help - that's his department. :-)
Build the Base, Fence, and Foundations
The base is a rectangular "box" that is decorated before the station is installed. For this project, it should be about 4"x6" and 1/2"-to-5/8" thick. The foundations are simpy rectangles that help the building and tower stay in place after everything is glued together. The fence is cut from thick cardboard, such as the back of a writing tablet, or the fine corrugated cardboard the Post Office uses for small shipping containers. I made the round holes in my fence with a heavy-duty paper punch.
Cut and Build Up The Base - Build the base up from layers of corrugated cardboard glued together in a sandwich. You then wrap and glue a strip of thin poster-board or cereal-box cardboard all around it to smooth over the rough edges of the corrugated cardboard.
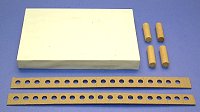 Wrap the Base - When the base is built and the glue is dry, you cover it with white bond paper just like you would wrap a gift, except that all surfaces of the paper cover must be completely glued down to the box. A glue stick works great for this. Wrap the Base - When the base is built and the glue is dry, you cover it with white bond paper just like you would wrap a gift, except that all surfaces of the paper cover must be completely glued down to the box. A glue stick works great for this.
Note: More details about building bases are provided in our article: Building Glitterhouse Bases
Cut the Foundations - You can use scraps of foam core board or stiff corrugated cardboard, since the edges won't show. Don't glue them down until you have assembled the building and tower - the fit needs to be a bit loose so the foundations don't exert lateral pressure on the structures' seams.
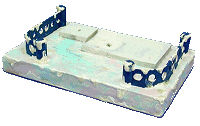
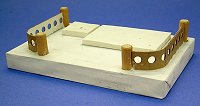 Assemble the Fence - After you've figured out where the structures will go by laying out the foundation pieces, decide where you will want the fence posts. Use a sharp knife (like a Xacto knife) to cut out shallow holes in the base where the fence posts will go. After you've glued those in place, bend and glue the fence as shown in the photo to the right. You will probably have to cut off some extra material. Assemble the Fence - After you've figured out where the structures will go by laying out the foundation pieces, decide where you will want the fence posts. Use a sharp knife (like a Xacto knife) to cut out shallow holes in the base where the fence posts will go. After you've glued those in place, bend and glue the fence as shown in the photo to the right. You will probably have to cut off some extra material.
Cut Out the Structure Pieces
- Carefully transfer the patterns of all pieces to the cardboard building stock. A .05 mm lead mechanical pencil and a “C-Through” brand ruler make this accurate and easy.
- Put new blades in the knife that you will be using.
- Score the fold lines before you begin cutting out the main structure parts. Use the metal ruler or other steel edge as a guide.
- Still using a steel-edged ruler as a guide, cut out the shapes. Watch your fingers.
Assemble and Paint the Structures
Note: You'll notice that there is some "hurry up and wait" involved with this portion of the project. That's one reason I often work on more than one building at a time. - Using Elmer's white Glue-All or a similar product, assemble the house pieces.
White glue works best if you apply a thin coat to each mating surface and wait a few moments for the glue to become tacky. Do not glue the building to the base until the instructions say to. You CAN check the fit as you progress by setting it on the foundation, if you wish.
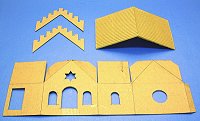
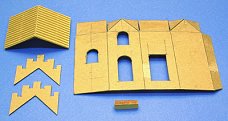
- Fold the building walls where you have scored them and glue the tabs that hold them together (below left). Do the same for the tower. You may find clothespins useful for holding things in place. While it's drying, be sure to check it every so often in case something has slipped out of place.
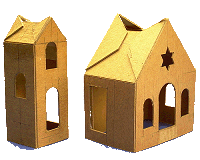
- After the buildings are thoroughly dry, glue them together. In the photo above right, you can see that the step is also glued in place.
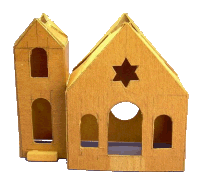
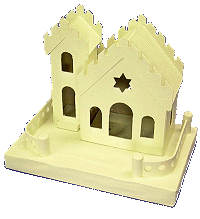
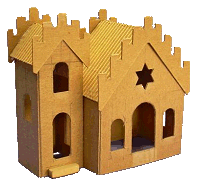 When the buildings are thoroughly stuck to each other, glue on the trim as shown to the right. Note: The trim in this photo is not the same as the trim in the patterns. The trim in the patterns is correct. When the buildings are thoroughly stuck to each other, glue on the trim as shown to the right. Note: The trim in this photo is not the same as the trim in the patterns. The trim in the patterns is correct.
- After the trim is secure, trim the roof pieces as necessary to fit between the trim on the roof without causing any outward pressure.
- After the building is dry, you may check the fit on the foundation and base if you'd like (below left), but don't glue it down yet.
- Prime everything - the building, trim, base, and fence - with flat white wall paint (above right). Again, the buildings are not glued to the foundation yet. Don’t skip this step; it gives you a uniform surface for painting.
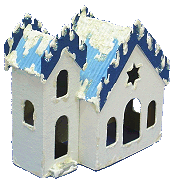
- Paint the building in your choice of colors (below left). I use acrylics from the Wal-Mart craft department. For anything that is painted gold, silver or bronze, I use “Testors” brand model paint. You'll see for this project that I dabbed on some seriously thick white paint to represent snow drifting over the edges of things - that part is optional.
- Paint the base and fence (above right). A white base with random swirls and dabs of very light pastel blue and pink are a good choice. Paint the fence a color that ties in with the building but is dark enough to contrast with the base. I suggest you not use yellows, beiges or greens in the snow.
- When the paint is throughly dry, add clear glitter to the house and the base. Brush on a thin, but even coat of undiluted white glue and sprinkle on the glitter. Don’t try to do the entire house or base at once. White glue starts to film-over and dry quickly so just do a wall or a section at a time. The glue dries clear so don’t judge the final look until the glue is dry. Again, do not glue the buildings to the base yet.
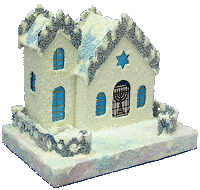 Cut out the window material and glue it in place from the inside. When the glue is dry, use the gold pen and a straightedge to draw mullions on the windows. Cut out the window material and glue it in place from the inside. When the glue is dry, use the gold pen and a straightedge to draw mullions on the windows.
- When you're completely satisfied with how things have gone together, glue the building to the foundation/bass assembly. As you can see in the photo to the right, I added a bit of glue and some more glitter where the building meets the base to give a more finished appearahce.
Add Finishing Touches
If you wish, you can use several light coats of clear satin acrylic spray to protect the paint and glitter from handling and light. Conclusion
You can see that, when you get to the gluing, painting, and glittering stages, there's a lot of "hurry up and wait." That's one reason many people who build modern putz house recreations work on two or three houses at the same time - you can work on the second house while the glue is setting on the first one, and so on.
[Editor's note: Howard has three grown children with families and Christmas villages of their own, which is why he often makes four buildings at the same time, so he gets to keep one. - Paul]
Looking for Your Ideas, Projects, or Photos - Also, if you have similar project, ideas, or photos that you'd like to share with your fellow readers and hobbyists, please get in touch. We'd love to add them to our sites, and we'll be sure to give you full credit for your contribution.
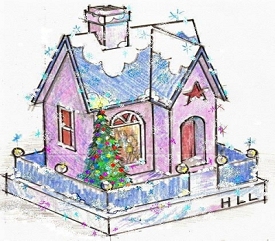 Commercial "Plug" - Now that I'm in "retirement," this hobby has become a sort of avocation for me. Several folks have commissioned me to build specific houses for them. I often provide an "artist's conception" such as the one at the right to make certain I understand what they want. Sometimes the "artist's conception" needs to be tempered by adjustments to make the house fit in better with the other houses it will be joining, as well as color and accessory changes. But it all starts, quite literally, at the drawing board. Commercial "Plug" - Now that I'm in "retirement," this hobby has become a sort of avocation for me. Several folks have commissioned me to build specific houses for them. I often provide an "artist's conception" such as the one at the right to make certain I understand what they want. Sometimes the "artist's conception" needs to be tempered by adjustments to make the house fit in better with the other houses it will be joining, as well as color and accessory changes. But it all starts, quite literally, at the drawing board.
Perhaps you had a pasteboard house collection when you were young and would like to have a replica made. Or you have an idea for something that's never been done. If you can find a photo or hash out a drawing or anything else to give me some idea of what you're looking for, that can be enough to get started.
If you'd like me to help you design and/or build a special vintage pasteboard house for you, or if you have any questions at all, please see my site, LittleGlitterHouses.com for more information.
If you liked this project, you may also like:
 Building Tinplate-Inspired Goose-Neck Lamp Posts Add even more vintage variety to your tinplate-inspired communities, for less than $1 each worth of materials. Free downloadable instructions are provided. Building Tinplate-Inspired Goose-Neck Lamp Posts Add even more vintage variety to your tinplate-inspired communities, for less than $1 each worth of materials. Free downloadable instructions are provided.
- Building a Vintage "Lithographed" Station"
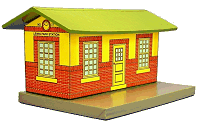 - the first article in our "Tribute to Tinplate" series, based on a prewar American Flyer standard-gauge station. Includes free, downloadable graphics, plans, and instructions for modeling in O/S and Large Scale/Standard Gauge. - the first article in our "Tribute to Tinplate" series, based on a prewar American Flyer standard-gauge station. Includes free, downloadable graphics, plans, and instructions for modeling in O/S and Large Scale/Standard Gauge.
- Building a Vintage Tin-Style Cottage
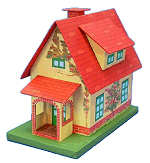 - This project is inspired by a popular pre-war tinplate house that was made to go with standard gauge trains, like the early 1900s-era Ives and Lionel. Paul Race's commercial-quality graphics, as well as Howard Lamey's plans and assembly details are all free, to give your railroad a vintage tinplate look with a few cents' worth of materials. Many options are available, and most graphics and plans can be downloaded directly from the article. - This project is inspired by a popular pre-war tinplate house that was made to go with standard gauge trains, like the early 1900s-era Ives and Lionel. Paul Race's commercial-quality graphics, as well as Howard Lamey's plans and assembly details are all free, to give your railroad a vintage tinplate look with a few cents' worth of materials. Many options are available, and most graphics and plans can be downloaded directly from the article.
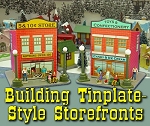 Building TinPlate-Syle Store Fronts -
Expanding our Tribute to Tinplate(tm) community is a set of down-town-style store fronts inspired by a series of tinplate candy containers that were made in the early -to-mid 1900s by West Brothers. The original containers were pretty small, but we've redrawn the graphics in larger scales and added a bit of additional detail so they'll fit into any tinplate or faux-tinplate setting. Building TinPlate-Syle Store Fronts -
Expanding our Tribute to Tinplate(tm) community is a set of down-town-style store fronts inspired by a series of tinplate candy containers that were made in the early -to-mid 1900s by West Brothers. The original containers were pretty small, but we've redrawn the graphics in larger scales and added a bit of additional detail so they'll fit into any tinplate or faux-tinplate setting.
 New
Feature - Building a Tinplate-Inspired Lamp Post The ideal accessory for the Lewis Park Station, or any station or city hall on your railroad or holiday village. No, they don't actually light, but they are cheap and easy to build and add a great deal of vintage interest to any setting. Free downloadable plans are available in several scales. New
Feature - Building a Tinplate-Inspired Lamp Post The ideal accessory for the Lewis Park Station, or any station or city hall on your railroad or holiday village. No, they don't actually light, but they are cheap and easy to build and add a great deal of vintage interest to any setting. Free downloadable plans are available in several scales.
 New
Feature - Building a Tinplate-Inspired Watchman's Shanty Back in the day before automated crossings, these were common sites alongside busy rail crossings. Howard's exclusive design pays tribute to a series of tinplate structures that go back a hundred years and include three different scales. His free plans and instructions will help you dress up any indoor railroad or holiday village. New
Feature - Building a Tinplate-Inspired Watchman's Shanty Back in the day before automated crossings, these were common sites alongside busy rail crossings. Howard's exclusive design pays tribute to a series of tinplate structures that go back a hundred years and include three different scales. His free plans and instructions will help you dress up any indoor railroad or holiday village.
 New
Feature - Building a Tinplate-Inspired Railroad Crossing Sign This is the ideal accessory for the Watchman's Shanty project. Based on a series of products that are now available only as expensive collector's items, this easy and almost-free project will add texture, interest, and period to any model railroad or holiday village. New
Feature - Building a Tinplate-Inspired Railroad Crossing Sign This is the ideal accessory for the Watchman's Shanty project. Based on a series of products that are now available only as expensive collector's items, this easy and almost-free project will add texture, interest, and period to any model railroad or holiday village.
 Building the Union Station - This original project by designer Howard Lamey is inspired by two traditions - the cardboard Christmas houses that were popular in US homes between 1928 and 1965 and the Lionel station that was popular for most of the 20th century. Building the Union Station - This original project by designer Howard Lamey is inspired by two traditions - the cardboard Christmas houses that were popular in US homes between 1928 and 1965 and the Lionel station that was popular for most of the 20th century.
- Easy Street Scene - This new
 building project uses downloadable building graphics and a little cardboard or foam board to build up a convincing downtown scene that is only a few inches deep - perfect for shelf layouts, tight spots, and dioramas. We also provide links to high-resolution graphics that will work for any scale. building project uses downloadable building graphics and a little cardboard or foam board to build up a convincing downtown scene that is only a few inches deep - perfect for shelf layouts, tight spots, and dioramas. We also provide links to high-resolution graphics that will work for any scale.

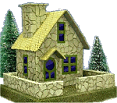 Build a Vintage-Style Cardboard Stone Cottage - This building project is made like the vintage cardboard houses folks used to set around their Christmas tree in the early 1900s (before glitterhouses became common), but its design was inspired by a building that shows up on the "Isle of Sodor." The building uses free downloadable graphic paper to put a realistic stone veneer on an old-world cottage and fence. It works with Christmas villages, or with a little customization, would dress up any indoor railroad. A "brick cottage" option is also shown.
 Log Cabin Building Flat - This "building flat" uses downloadable graphics and foam board or cardboard to dress up a narrow corner of your railroad or village. The techniques in this project can be used for almost any kind of building you want to represent in a tiny space. December, 2007 Log Cabin Building Flat - This "building flat" uses downloadable graphics and foam board or cardboard to dress up a narrow corner of your railroad or village. The techniques in this project can be used for almost any kind of building you want to represent in a tiny space. December, 2007
- Build a Vintage-Style Barn and Silo - This
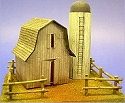 building project uses downloadable graphics to put realistic shingles and siding on an old barn and silo. Like the stone cottage above, it works with Christmas villages, or with a few changes, it would dress up an indoor railroad. building project uses downloadable graphics to put realistic shingles and siding on an old barn and silo. Like the stone cottage above, it works with Christmas villages, or with a few changes, it would dress up an indoor railroad.
Other Articles about cardboard houses include:
|


|








 Building Tinplate-Inspired Goose-Neck Lamp Posts

 Building TinPlate-Syle Store Fronts
 New
Feature - Building a Tinplate-Inspired Lamp Post
 New
Feature - Building a Tinplate-Inspired Watchman's Shanty
 New
Feature - Building a Tinplate-Inspired Railroad Crossing Sign
 Building the Union Station


