|
|
Note from Editor: Designer Howard Lamey likes building vintage-style cardboard houses for holiday villages. This project, though would be at home on any indoor model railway. It uses downloadable graphics from our Building Front page.
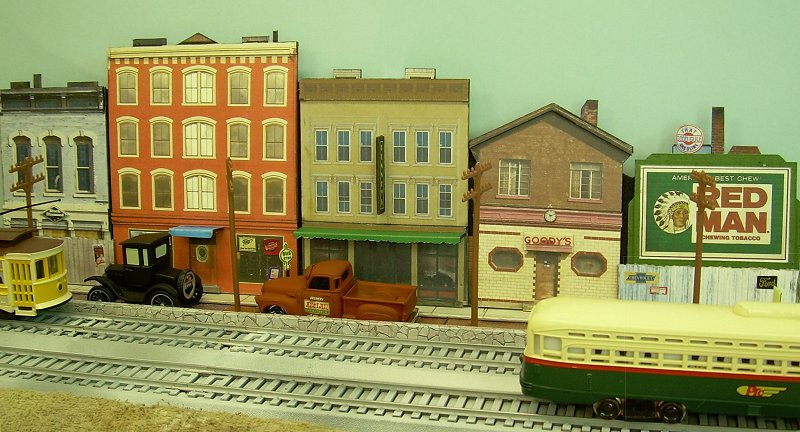
Easy Street Scene
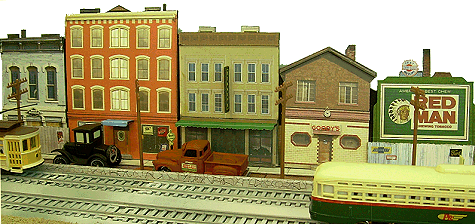
This is an easy, very inexpensive project that doesn't require much in the way of talent or fine measurements. The final project is only about 3-inches deep from the low front wall to the background but it looks a lot deeper, and will add a great deal of interest to any "blank walls" on your indoor railroad. The cost is almost nil if you use recycled cardboard.
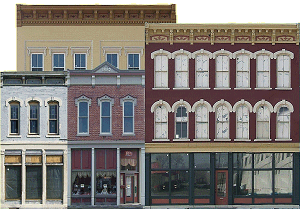 It uses Paul Race's building graphics, which are available in sizes suitable for Christmas villages or O scale/On30 railroads from Big Indoor Trains' Building Front Photos page. It uses Paul Race's building graphics, which are available in sizes suitable for Christmas villages or O scale/On30 railroads from Big Indoor Trains' Building Front Photos page.
For bigger sizes, go to the Family Garden Trains' Building Front Photos page.
For smaller sizes, use the O scale versions from the Big Indoor Train Building Front Photos page, and print at 50%.
This is a “layered” glue up project. The “layers” add just enough depth and show actual shadows. When viewed from straight on, or just to one side, the street scene looks much deeper than it is.
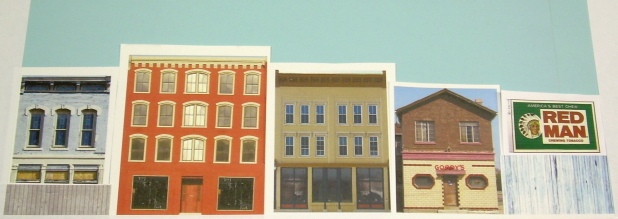
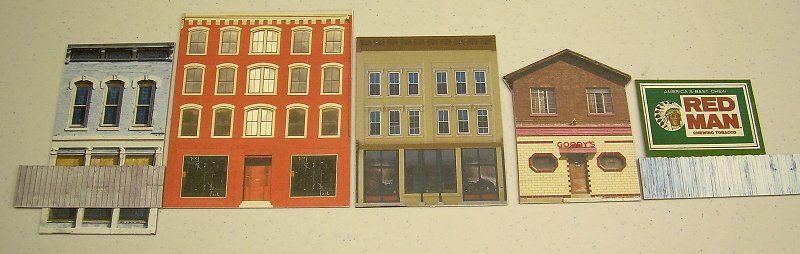
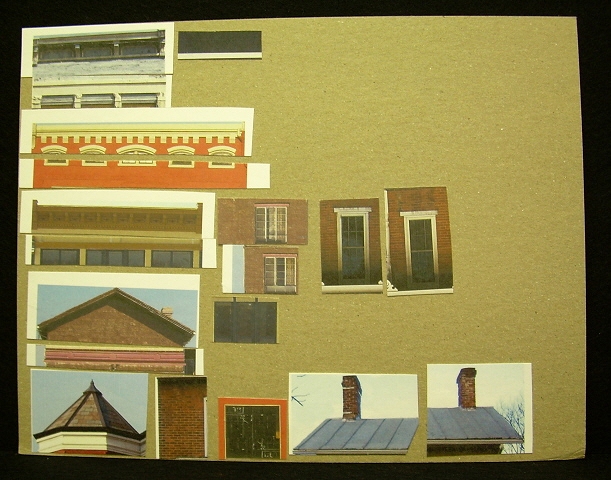
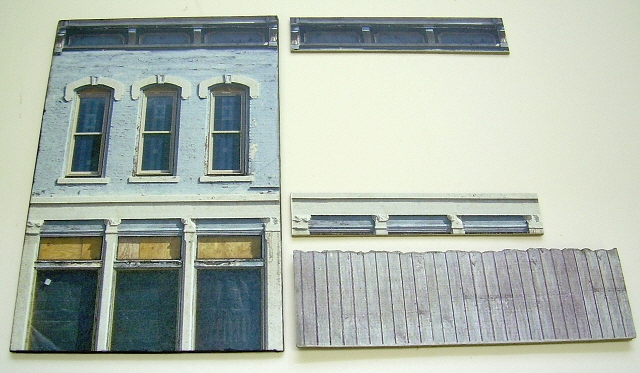
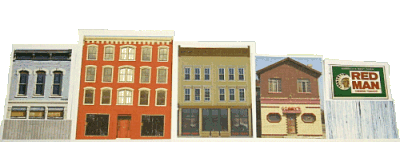
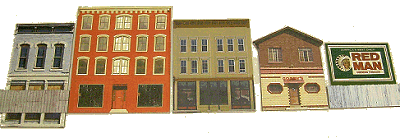
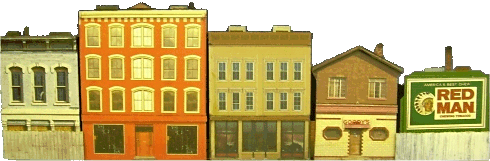
All pieces for the store front project are cut from graphics which have been mounted on cardboard.
Making the Pieces
- Print at least two color copies of each building you choose.
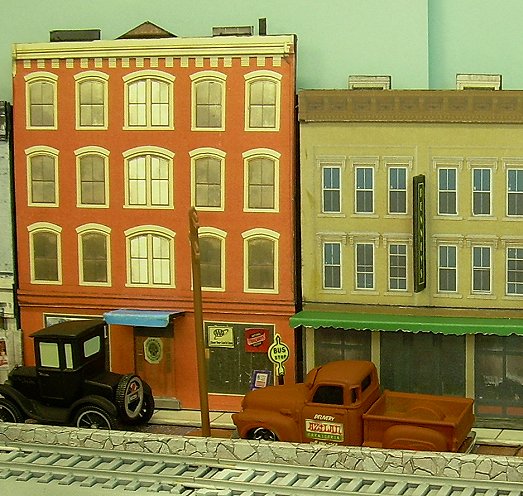
- The gray building was very small, so I actually printed it in a slightly larger scale than the other ones. Because it looked closed, I chose to "fence off" the lower level. Not only does this add dimension and interest; it also disguises the fact that the building will now have to be "chopped' a bit to maintain the overall height I wanted.
- The billboard graphic is from another source. Two good sources for signage are the Business and Station Signs page and the James Powell signage archive that you can access from the bottom of that page.
- The fence graphics are from our Building Textures page. We will also use street pavers and flagstones from those pages to complete our project.
- For this project, I also printed out some brick and stone pages to use for a street and sidewalk detail I planned to add (see below).
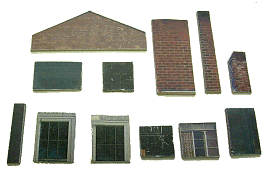
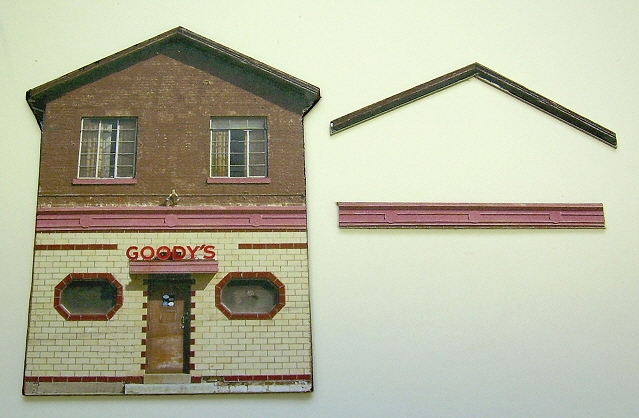
- Glue one copy of each building printout to a foam board or to a relatively thick piece of non-corrugated cardboard, such as the cardboard from the back of a legal pad.
- Cut out the profile for each building.
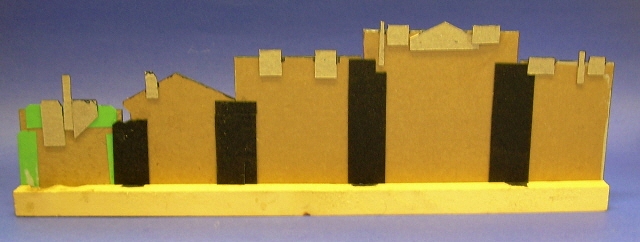
- Decide what "extra" pieces you want to add, depending on the building details you want to emphasize and the roof detail you would like to add. For this project, I printed out bits of other buildings and textures. The photo to the left below shows pieces of printouts that I glued to another piece of cardboard so I could cut them out without "wasting" a whole piece of cardboard. The photo to the right below shows the pieces I planned to use for roof detail after they have been cut out. Most of these will be small, non-descript “somethings;” they are made from pieces of dark color cardboard or scrap pieces left over from cutting out the details for layering onto the store fronts. They will be glued along the back edge of the store fronts. They will stick up a fraction of an inch and simulate roof hatches, skylights, small roof top buildings, vents, pipes and chimneys.
The following photos show the bits of trim I eventually cut out to go onto each of the buildings I selected. If you do this in Large Scale, you can add extra depth and realism by layering window-sills, trim over the windows, doorsteps, another layer of depth to the top trim, and so on. In fact, some very convincing structures have been built up this way.
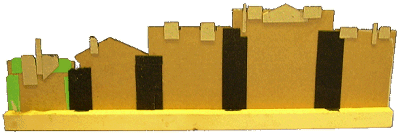
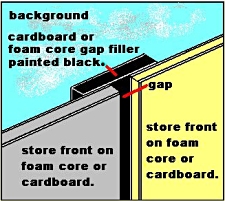 Make several strips of black cardboard that you can use to join the buildings together from the back. Make several strips of black cardboard that you can use to join the buildings together from the back.
- Before you start gluing things together, paint the edges of all pieces with an appropriate color flat acrylic paint to cover the white line that shows when graphics are cut.
Assemble
- Glue the trim pieces and roof detail onto the buildings.
- Glue the joining strips and an extra strip of wood to provide strength onto the back of each piece.
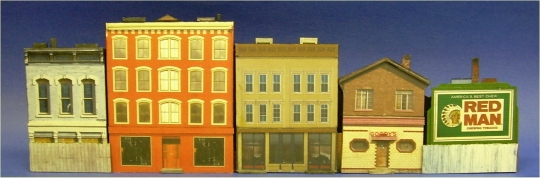
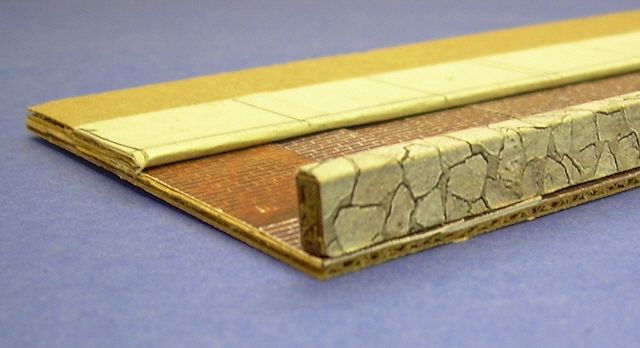
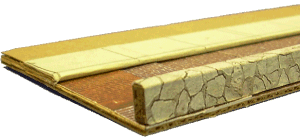 Assemble the sidewalk and street as desired. I glued a brick pattern to the "road." To create the "sidewalk," I simply drew pencil lines to simulate paving joints on a piece of light gray paper and wrapped it around another strip of cardboard. I then wrapped a long, low strip of cardboard with the stone pattern to provide a low wall that would separate the street from the railroad tracks. You could do this with a "hedge" or some other material if you'd like. Assemble the sidewalk and street as desired. I glued a brick pattern to the "road." To create the "sidewalk," I simply drew pencil lines to simulate paving joints on a piece of light gray paper and wrapped it around another strip of cardboard. I then wrapped a long, low strip of cardboard with the stone pattern to provide a low wall that would separate the street from the railroad tracks. You could do this with a "hedge" or some other material if you'd like.

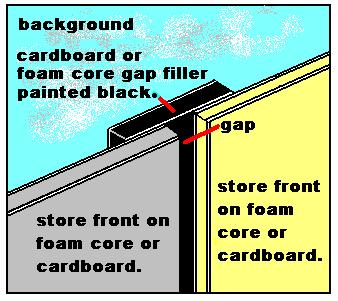
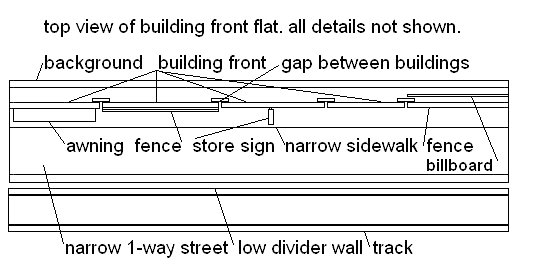
- Fasten the buildings to the sidewalk assembly. The drawing below shows the overall assembly from the top. I don't actually have a separate background glued to this assembly, but you can see how you could easily add another row of buildings or a mountain ridge or such to add even more apparent depth.
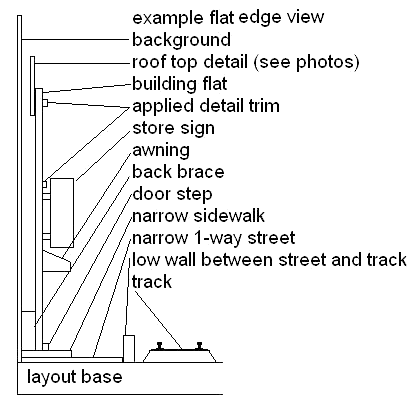
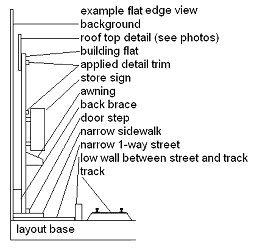 The drawing to the right shows the overall assembly from the side. The drawing to the right shows the overall assembly from the side.
- Add any additional signage you think will add appropriate character to your project. In addition to our Business and Station Signs and the James Powell signage archive, you can also use ads from junk mail, from the phone book . . .
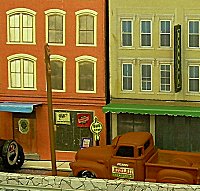
Some signage ideas can be seen in the detail to the lower right.
I made the department store sign on my computer, glued it to a cardboard base, and attached it by the edge to the store.
- You can also use optional “weathering” and “aging” techniques to enhance the scene and reduce the contrast between the different printed patterns.
- Spray the entire assembly with several light coats of a clear satin indoor/outdoor acrylic finish. This protects it somewhat from moisture and dust and also helps reduce fading.
Finish
Add you our own accessories such as figures, vehicles, telephone poles, street lamps and other “downtown clutter” to bring these flats to life.
Conclusion
Several other downloadable, cleaned-up building photos are available in two size ranges for you to use for similar projects:
 Sizes suitable for Christmas villages or O gauge, S scale, or On30 railroads are available from Big Indoor Trains' Building Front Photos page. Sizes suitable for Christmas villages or O gauge, S scale, or On30 railroads are available from Big Indoor Trains' Building Front Photos page.
- Sizes suitable for Large Scale trains (including 1:32 and larger scales up to 1:20.3 for some small buildings) are available from Family Garden Trains' Building Front Photos page.
Return to Howard's How-To's
|


|