


|
Note from Editor: Project designer Howard Lamey has begun a groundbreaking series of vintage-style cardboard structure projects just for Halloween. After he made two projects, I suggested a train station for his growing community, and this is what he put together.
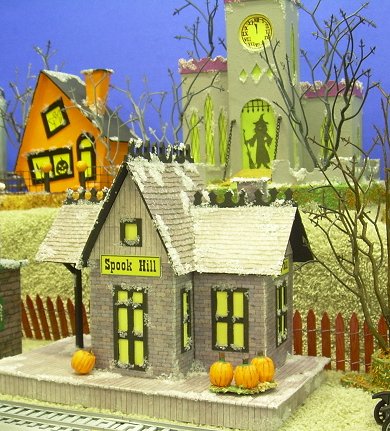
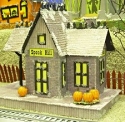
Building Spook Hill™ Station
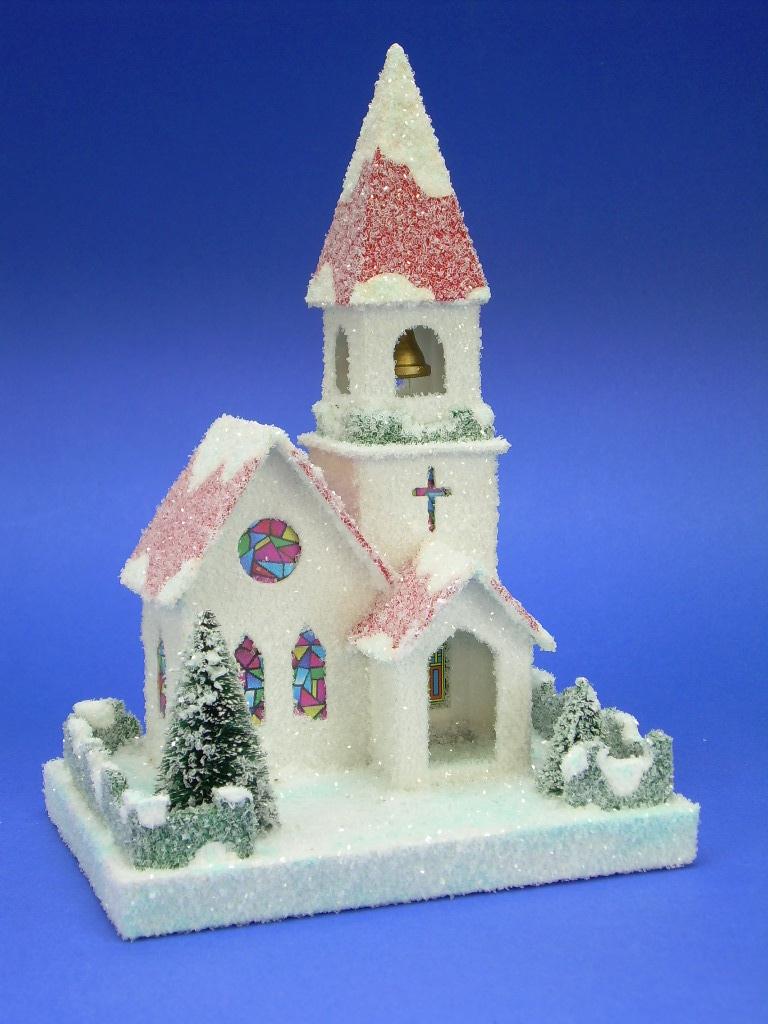
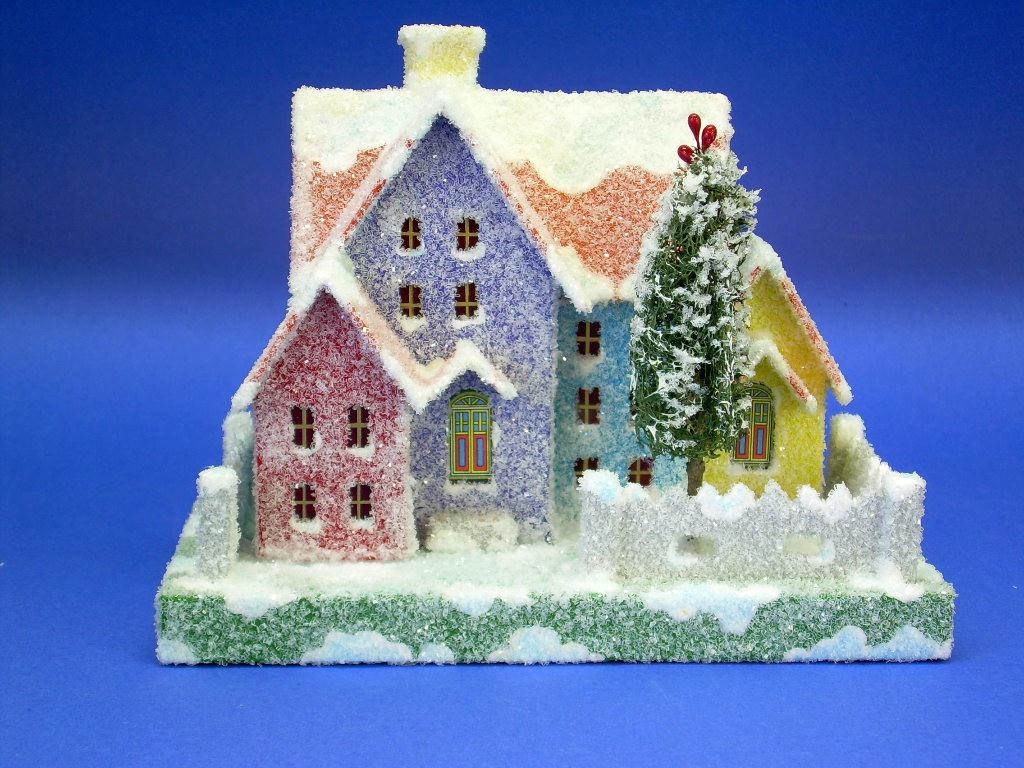
 The Spook Hill™ station project is truly unique. It is built like the vintage cardboard houses that were popular Christmas decorations between World Wars. But it also looks good with: The Spook Hill™ station project is truly unique. It is built like the vintage cardboard houses that were popular Christmas decorations between World Wars. But it also looks good with:
It is also the first Halloween-themed train station I have ever seen. (Yes, with slightly different colors, you could make a Christmas or Easter-themed station, but work with me here.)
This project is not quite a "glitterhouse," because the walls and roof are finished with printed graphic paper instead of paint and glitter. However most of the construction is very similar to building a glitterhouse, so we will refer to articles on glitterhouses in general from time to time.
What You Will Need
Clean cardboard (used is fine). This includes cereal boxes, the backs of writing tablets, corrugated box panels, anything flat, firm and clean, that you can save. Fine corrugated cardboard, such as the kind used in Express Mail boxes, would provide strength to the station platform, but isn't critical. In addition, for this project you'll need:
- A sharp mat knife or Xacto knife
- Elmer's white Glue-All. A glue stick would also come in handy.
- Clear glitter (optional)
- Several sheets of acid-free white bond paper
- Black acrylic craft paint or other color for the door frames, window frames, and trim.
- Other paint as desired
- A piece of wood to use for a supporting post (see photo). It should be about 4" long, but width and depth aren't critical. A popsicle stick would be too wide, in my opinion.
- Access to the Internet and a color printer.
- Yellow vellum, celophane, or similar translucent medium. I used a piece of flourescent yellow paper from the scrapbooking section of a craft store. It is so bright that the station looks like it's lit even when it's not.
For a more comprehensive list of tools and supplies that come in handy on any cardboard house project, please refer to our article What You Need to Build Glitterhouses.
Print The Patterns
This project has several structure patterns that you will need to cut out and transfer to cardboard, as well as three texture sheets that you will use to finish your station's appearance.
You may print the structure patterns on any sort of paper, since you're simply using this to transfer the plan to your cardboard media.
Printing the Plans - We've provided a full-sized PDF version of each plan sheet to help you print the plans at the size you need. You will need Adobe Acrobat Reader on your computer. Click on each plan drawing above to open the PDF version. Select the print option, tell it to "auto rotate and center." Don't select the "scale to page" or "shrink to fit" option. Print.
If for some reason this doesn't work, contact
Paul and ask him for help - that's his department. :-)
Printing the Patterned Paper - The patterns used on this project are from the Big Indoor Trains™Building Texture pages. If you would like to try a different pattern, please check them out. In the meantime, the following patterns will give you the same graphics used in this project. Print each on acid-free bond paper at the highest quality setting your printer allows.
Note: Most of the graphics printouts on this project were actually printed on an acid-free light card stock. This made the graphic sheets a little harder to fold cleanly but gave a sturdier overall effect.
Note: If you are interested in building for larger scales, you will find larger versions of the same patterns at the Family Garden Trains™Building Textures page.
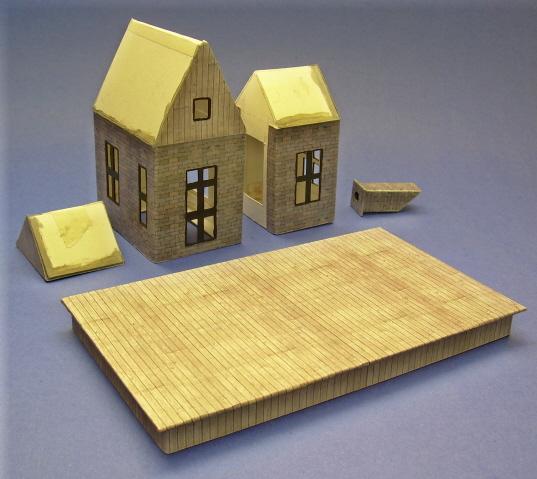
Building the Base
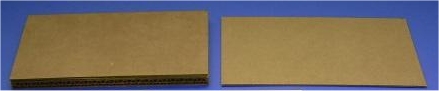
The base is a rectangular "box" that is built up from layered corrugated cardboard and capped with a slightly larger platform. 
- Make the base from four layers of corrugated cardboard glued together in a sandwich.
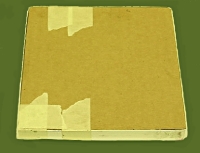 Cut the platform from a single heavy piece of solid cardboard, like the cardboard from the back of a legal pad, or else a fine corrugated cardboard like they use on Post Office Express Mail boxes. Cut the platform from a single heavy piece of solid cardboard, like the cardboard from the back of a legal pad, or else a fine corrugated cardboard like they use on Post Office Express Mail boxes.
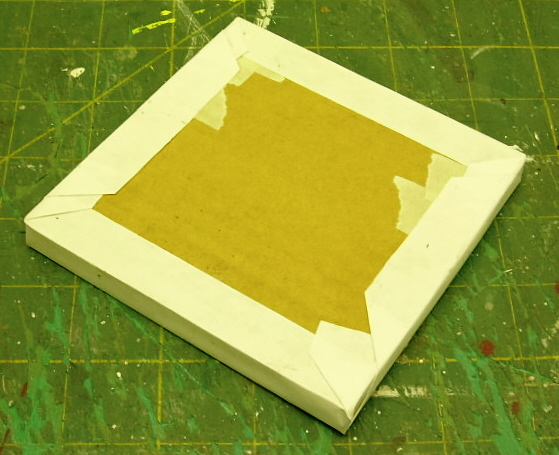
- Wrap and glue a strip of cereal-box cardboard all around it to camouflage the rough edges of the corrugated cardboard. (The two photos to the right are from another project, but they give the idea.)
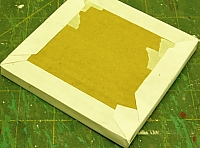 When the basic "box" is built, cover it with white bond paper just like you would wrap a gift, except that all surfaces of the paper cover must be glued down to the box. A glue stick works great for this. When the basic "box" is built, cover it with white bond paper just like you would wrap a gift, except that all surfaces of the paper cover must be glued down to the box. A glue stick works great for this.
- Cut a piece of the T-111 pattern (or other pattern of your choice) that will cover the top of the platform and leave at least a half-inch overlap all the way around. We had to use two pieces to make it long enough. The board pattern should be perpendicular to the length of the platform.
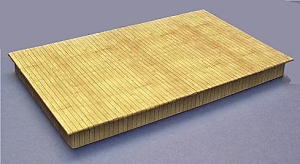 Glue the T-111 pattern onto the platform, wrapping it around the edges as precisely as you can and gluing it down firmly all the way around. Glue the T-111 pattern onto the platform, wrapping it around the edges as precisely as you can and gluing it down firmly all the way around.
- Cut strips of the T-111 pattern wide enough to cover the edge of the base. The board pattern should be perpendicular to the length of the strip.
- Glue the T-111 pattern around the edge of the base.
- Glue the platform on top of the base.
Note: For more information about building bases for vintage-style cardboard houses, please see our Glitterhouse Bases article.
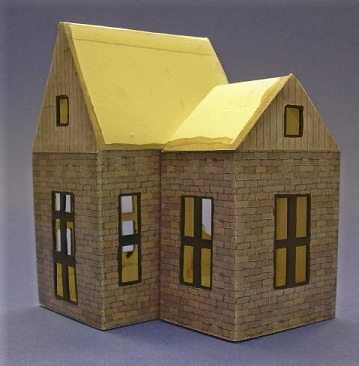
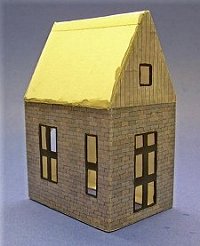
Building the Station
 For sanity's sake, you make certain that all of your measurements are good before you glue the patterned paper on. For sanity's sake, you make certain that all of your measurements are good before you glue the patterned paper on.
- Transfer the patterns to cardboard.
- Score the fold lines of the station walls, then cut out that piece and fold on score lines.
- Assemble and glue each section of the station but don't glue them together yet.
 Using black acrylic paint, paint the window and door frames and the exposed edges of cardboard that will not be covered when the printed siding and roof are applied. Using black acrylic paint, paint the window and door frames and the exposed edges of cardboard that will not be covered when the printed siding and roof are applied.
- Apply the printed graphics of the siding and gable. Do a section at a time. Measure carefully, make crisp folds, apply glue and press in place. You're better off leaving the graphic paper a tad long than a tad short.
- Trim the edges of the graphic paper, if necessary.
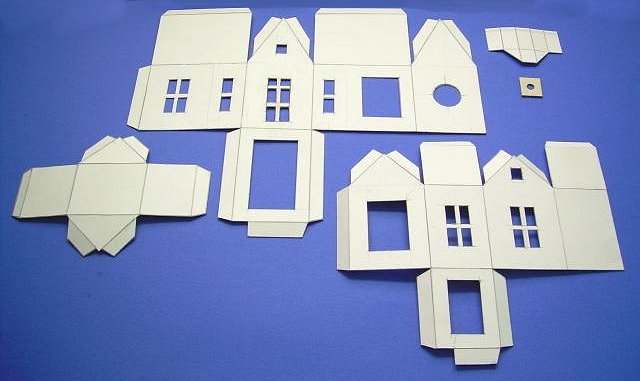
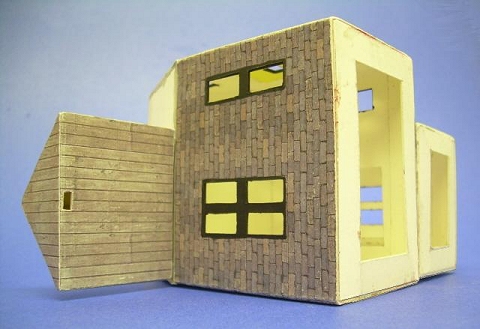
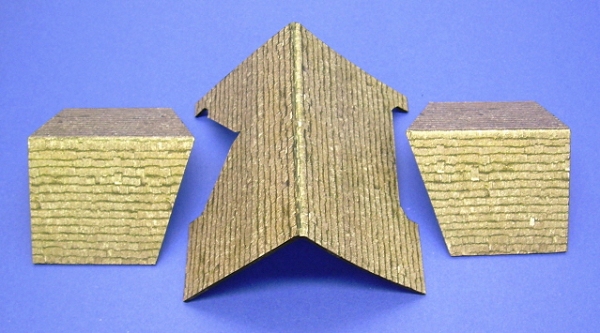
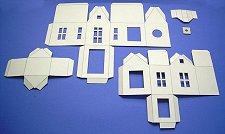
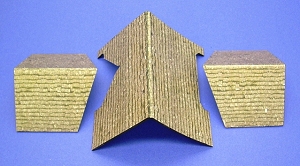
The photo to the lower left shows the underside of the roof overhang section. The T-111 siding pattern has been applied to the "ceiling" to give it a "porch ceiling" effect. This piece has also been notched to accept the support post that is shown in the detail below. The photo to the lower right shows the major station components, each glued together, with windowframes painted, and graphics paper applied.
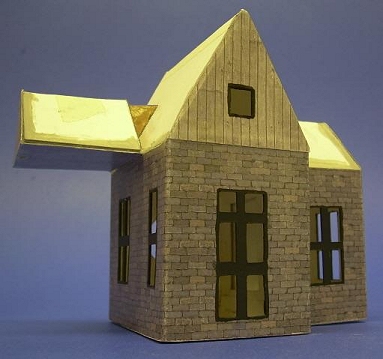
- Glue the "right wing" to the center section (shown at the left below). The "back wall" of the right wing should line up with the back of the center section.
- Make a wedge-shaped cardboard brace to fit between the roof of the main section and the roof of the open section. You can use the small roof pattern to get a started on the basic shape, but you will have to cut it to fit. This may take couple of tries to get the
size exactly right. See the right photo below for an example. When you're certain you have the right fit, glue the brace to the roof of the main section and let it dry. Then it will be relatively easy to attach the "left wing" overhang.
The left photo below shows how the station should look from the bottom at this stage.
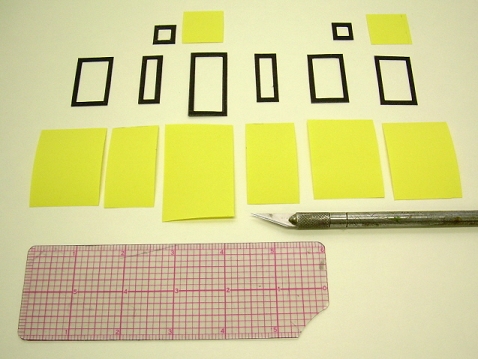
- Cut out the window-frame and door-frame pieces and whatever you are using for "glazing." Check the fit of the window and door frames, then paint them. The right photo below shows how these pieces should look when they're ready to apply.
- Cut out the roof pieces. Score a fold line for the peak. Put the peak of each roof section on the high point of the section to check the fit. You may have to make more than one roof to get best fit.
 When you are sure you have a good fit, cut and apply the shingle graphics for each piece. When you are sure you have a good fit, cut and apply the shingle graphics for each piece.
- When that is dry, paint the underside of the roof overhang.
- Glue the roof pieces to the structure.
- Apply the window "glazing" and the window and door frames if you haven't already.
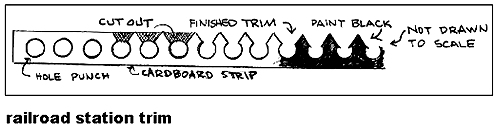
- From a strip of rigid cardboard, create the roof trim. You start this process by punching a series of holes in the cardboard strip as shown below. We have no scale drawings for this part of the project because the size of the cardboard strip you use and the distance between the holes depends on the size of your hole punch. When you are through, cut diagonal lines in the cardboard as shown to create a gingerbread pattern. By the way, this "trim" served real functions on old train stations - it discouraged pigeons, and it usually served as an extension of the lightning rod system.
- Cut the lengths of "roof trim" you will need and paint them. When they are dry, glue them to the roof.
- When all of the the glue is dry, examine the structure thoroughly. You will see white edges of paper that siding and roof graphics are printed on when you cut pieces to fit various surfaces. With a felt-tip pen, marker, or acrylic paint and a very tiny brush, carefully coat just the edge of paper and touch up the edge of cardboard if needed.)
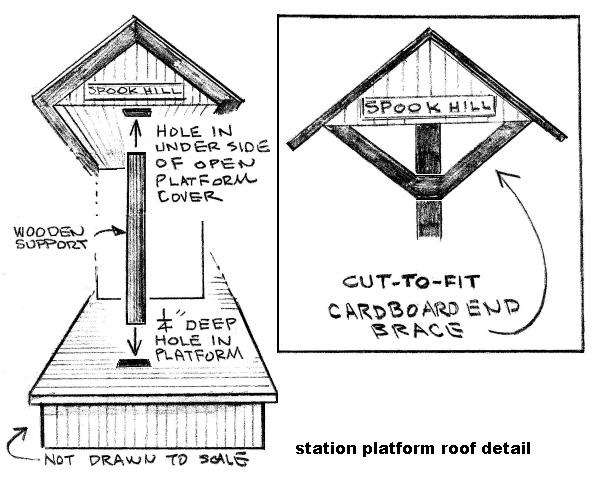
- Before gluing the station to the platform, determine where the supporting post for the overhanging section will need to go and cut a hole for inserting the end of the post. The drawing below shows how this piece will be installed eventually. The photo below shows how the post and braces will look when they are completely installed.
 If you wish, you may print the Spook Hill signage, cut out some signs you like, glue them to card stock, cut out the card stock, touch up the edges with a black marker, and glue them to the building. The graphic page has some extra signs you can put on other projects you build later if you wish. If you wish, you may print the Spook Hill signage, cut out some signs you like, glue them to card stock, cut out the card stock, touch up the edges with a black marker, and glue them to the building. The graphic page has some extra signs you can put on other projects you build later if you wish.
- Glue the station to the base.
Finishing Details
- Apply several light coats of clear satin spray on entire project to protect the printed graphics and painted trim.
- When all the glue and satin spray has dried, use clear glitter sprinkled over Elmer’s Glue-All to add little touches of frost on the roof, chimney, fence, and base.
 The Big Indoor Trains™ Resource pages include several other downloadable, cleaned-up building texture pages in several size ranges for you to use for similar projects: The Big Indoor Trains™ Resource pages include several other downloadable, cleaned-up building texture pages in several size ranges for you to use for similar projects:
Conclusion
Paul speaking here: When Howard was done taking photos for this year's Spook Hill projects, he sent me the station he had built while creating this project. Due to Howard's careful craftsmanship, this fun project has produced what could easily become a family heirloom. Once again, I am glad to be able to help Howard bring his project ideas to our readers.
I also can't help thinking how many different ways this project could be useful. For example:
- You could use different colors of celophane and trim to create a station for Christmas or any other season.
- With a little redesign, you could use this project as the basis for a realistic country station on a "serious" O-scale model railroad.
Howard has often been "commissioned" to design and or build vintage-style cardboard houses for collectors and fans of this delightful, but usually underrated art form. That's why he started his own web site, LittleGlitterHouses.com. If you would like to ask Howard to bid on a project for you, or if you have any questions for Howard, stop by there and you'll find direct contact information. If you have any questions for Paul, use this link.
Finally, if you have a similar project you'd like to share with your fellow readers and hobbyists, let us know. We'd love to add it to one or both of our sites, and we'll be sure to give you full credit for your contribution.
Commercial "Plug"
A Note from the Designer: Now that I'm in "retirement," this hobby has become a sort of avocation for me. Several folks have commissioned me to build specific houses for them. So if you'd like me to "bid" on a cardboard house for you, or if you have any questions at all, please visit our Orders page. - Howard
Also, if you have a similar project you'd like to share with your fellow readers and hobbyists, we'd love to add it to our site, and we'll be sure to give you full credit for your contribution.
Update for September, 2008
This building is part of a collection called Spook Hill™.
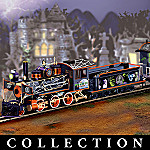
These cardboard vintage-style Halloween building project are perfect for giving your mantle, or your HO, On30, S, or O-gauge railroad a special bit of Halloween cheer. The links below will take you to the buildings in the 2008 series.
| New, August, 2008! Spook Hill™ #1 - Shakey Pane Manor - Here's a new Halloween-themed building project that based on forms typically used in some of the more elaborate cardboard Christmas houses that were made in Japan between 1920 and 1930. This is the first of our series of Spook Hill™ buildings, enough to give you a fantastic creepy community by October. | 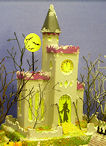
|
| New, August, 2008! Spook Hill™ #2 - Spook Hill Station - Here's the first-ever Halloween-themed train station craft project. This is the second of our series of Spook Hill™ buildings, designed to look good with Halloween Trains of all kinds, and to get your community ready to receive guests by Halloween.
| 
|
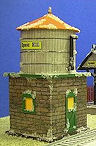
| New, September, 2008! Spook Hill™ #3 - Spook Hill Water Tower - Here's the first-ever Halloween-themed train station craft project. This is the second of our series of Spook Hill™ buildings, designed to look good with Halloween Trains of all kinds, and to get your community ready to receive guests by Halloween.
| 
|
Other Resources for Putz Houses and Related Information
|


r>


|