|
|
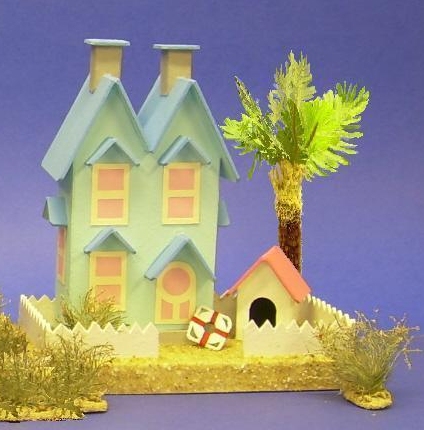
 Note from Editor: Glitterhouse designer/builder Howard Lamey created these "palm trees" clumps to go along with a beach house project he was working on. He also suggested using this project with a manger scene. This is how he explained this fun and simple project to me.
Modeling Palm Trees
This easy project will bring a sea-side texture to your indoor railroad or display village.
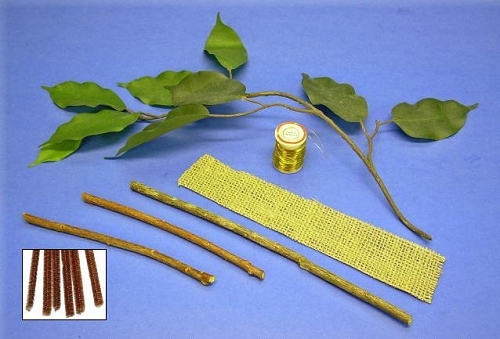
Materials

- Artificial leaves, like those from an artificial "silk" fig tree. The leaves are best if they have a wire going up into the leaf part, that gives you more control over the final appearance. You'll need 5-7 leaves per tree, more if you're making a very large tree.
- Burlap scraps
- Brown pipe cleaners (like you get at the craft store)
- A twig or dowel for the "trunk" (For a thinner trunk, you may use a piece of #10 or #12 electrical wire instead.)
- Fine wire for binding the leaf stems. You can use button hole thread, if you have that on hand.
- White glue like Elmer's
- Sawdust
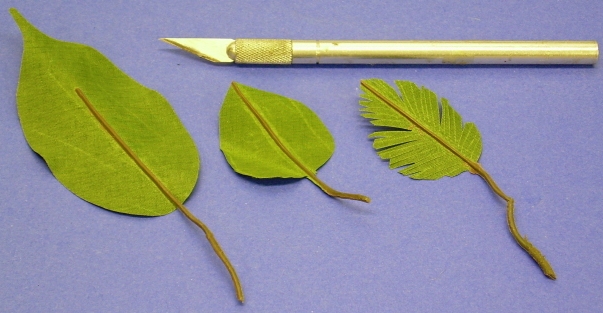
- A sharp craft knife
- Masking tape
- Cardboard for the base (optional if you want to fasten the tree directly to something you've already made, like the base of one of our beach houses)
- Acrylic paint in a neutral color like beige or light brown for painting the base (optional, depending on how you are installing the finished tree)
- Sand for gluing to the base (optional, depending on whether or not you are using a separate base. I used aquarium sand; you can use "play" sand, swimming pool filter sand, whatever looks right with the rest of your setting. (optional, depending on how you are installing the finished tree)
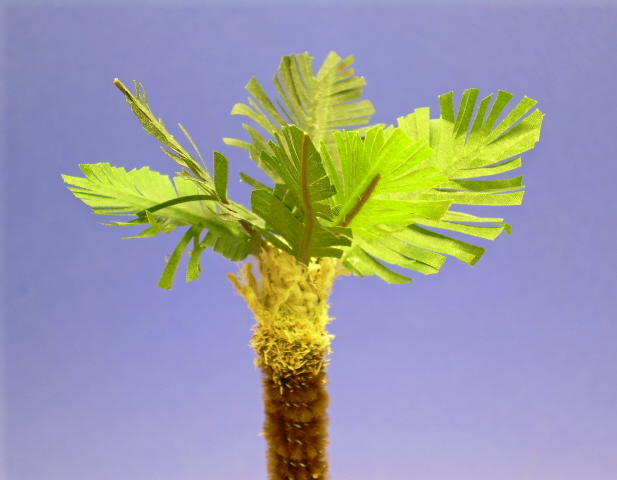
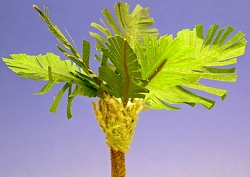
Making the Palm Leaf Clump
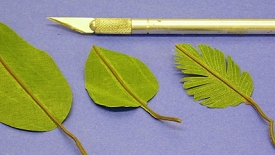 Trim the leaves into uneven heart shapes. Don't make them all exactly the same size. (Note: For a more tropical look, allow the "leaves" to remain longer, more like blades of grass than the examples shown.) Trim the leaves into uneven heart shapes. Don't make them all exactly the same size. (Note: For a more tropical look, allow the "leaves" to remain longer, more like blades of grass than the examples shown.)
- Cut the leaf into ribbon strips about 1/16" to 1/8" wide with a sharp craft knife.
- Cut the edges of randomly selected strips to a point and shorten others for a natural look...
- Ruffle, crinkle, wrinkle and muss-up the strips...don't leave them all laying in same direction...
Making the Trunk
- Make the trunk longer than the finished tree to start with; the extra length gives you a handle while you work.
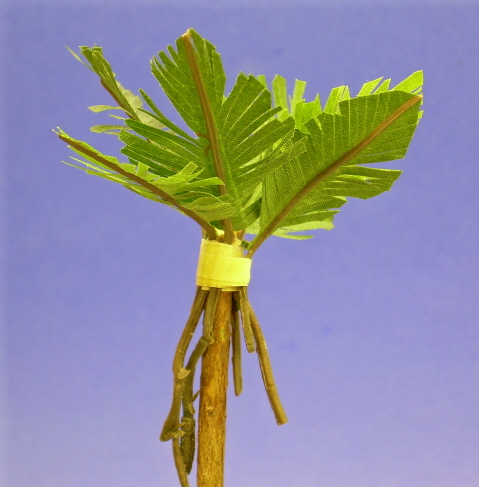
- Attach the fronds to the trunk with a narrow strip of masking tape (below left).
- Trim off any stems that stick out below masking tape binding.
- Wrap and bind the masking tape with fine wire (abover right). Alternatively, you can use button hole thread as an option.

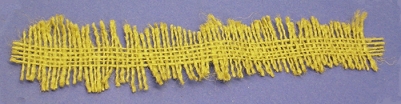
- Unravel your burlap strip a bit as shown in the photo to the right.
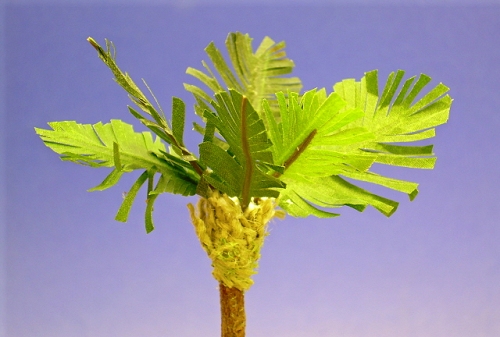
 Now glue it around the bound area to cover the masking tape and wire (or thread). Now glue it around the bound area to cover the masking tape and wire (or thread).
For best results, let the glue dry before the next step, and between each of the following steps.
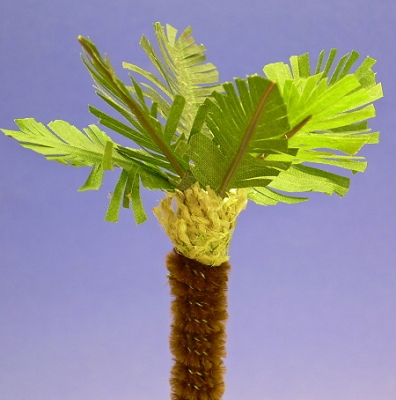
- Twist the brown pipe cleaner around trunk, starting at the base of burlap and
 working your way down. working your way down.
- Secure both ends with white glue. Allow to dry thoroughly.
- If you wish, once the glue is dry, you can "tone down" the color of the trunk with a dry brushed application of gray acrylic paint.
- Lightly coat the top of the trunk wrap and the bottom of the burlap with white glue and
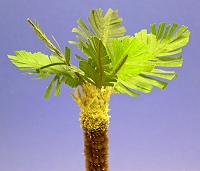 sprinkle on sawdust. sprinkle on sawdust.
- If you can see the top of trunk through the green fronds, dab on white glue and a sprinkle of green dyed sawdust.
- Trim the trunk to the desired length.
- Install in a hole in your project, or make a separate base (optional)
Making the Base
- Make the base out of irregular cardboard shapes. Thick cardboard like the back of a writing tablet is best. If you use corrugated cardboard, you'll have to make a point of gluing sand around the edges to cover up the holes.
- Paint the base with the color you chose to blend with your sand; then punch a hole in the middle to fit your "trunk."
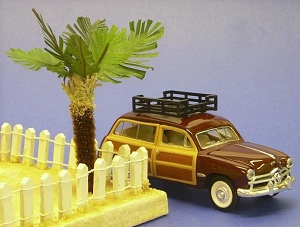
- Glue the palm trunk into the base. For an even more attractive seaside look, add some "sea grass" to the same base.
- When the assembly has dried, glue sand over the base.
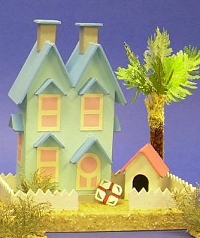 Conclusion Conclusion
The palm tree in this example looks a lot like the "scrub palms" that grow well in many parts of Florida. It looks especially nice if you intermix it with the results of our Modeling Sea Grass project. Again, if you want a more dramatic tree, say for a nativity or tropical setting, use a narrower material for the trunk, and cut the palm leaves longer and narrower.
Please let us know if you find this project useful - we especially appreciate photographs.
Also, if you have a similar project you'd like to share with your fellow readers and hobbyists, we'd love to add it to our site, and we'll be sure to give you full credit for your contribution.
Return to Howard's How-To's
|


|