|
|
Note from Editor: Project designer Howard Lamey has made whole villages of vintage-style cardboard structures for Christmas and Halloween. When I saw this lighthouse and some other seaside-style buildings, I asked him if we could publish those as as well.
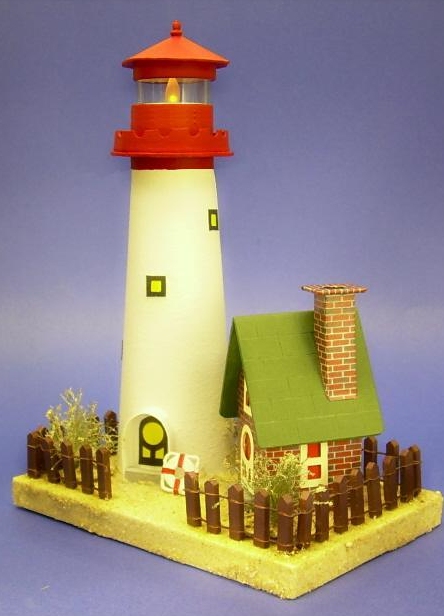
Building the Sandy Shores Lighthouse & Keeper's Cottage
 This project is really two "buildings," a lighthouse made from a cone of rolled up cardboard, and a small cottage made with our free downloadable brick pattern. This project is really two "buildings," a lighthouse made from a cone of rolled up cardboard, and a small cottage made with our free downloadable brick pattern.
In the days before GPS, lighthouses dotted the coastlines and much of the Great Lakes, guiding shipping near the coast. Today, of course, they are not as important to shipping, but many are maintained for their historical interest. One interesting fact is that almost every light house had a distinct paint pattern and color scheme. That way someone who was way off course, but saw a lighthouse could tell where they were, just by knowing (or looking up) the patterns. If there is a lighthouse near you, you may want to take a photo and try to replicate that pattern on your project.
The cottage is a small version of Howard's "Stone Cottage" project. If you go to that page, you'll see both brick and stone examples. Of course, you can just paint the keeper's cottage or choose another pattern for it from our building textures page or from somewhere else altogether.
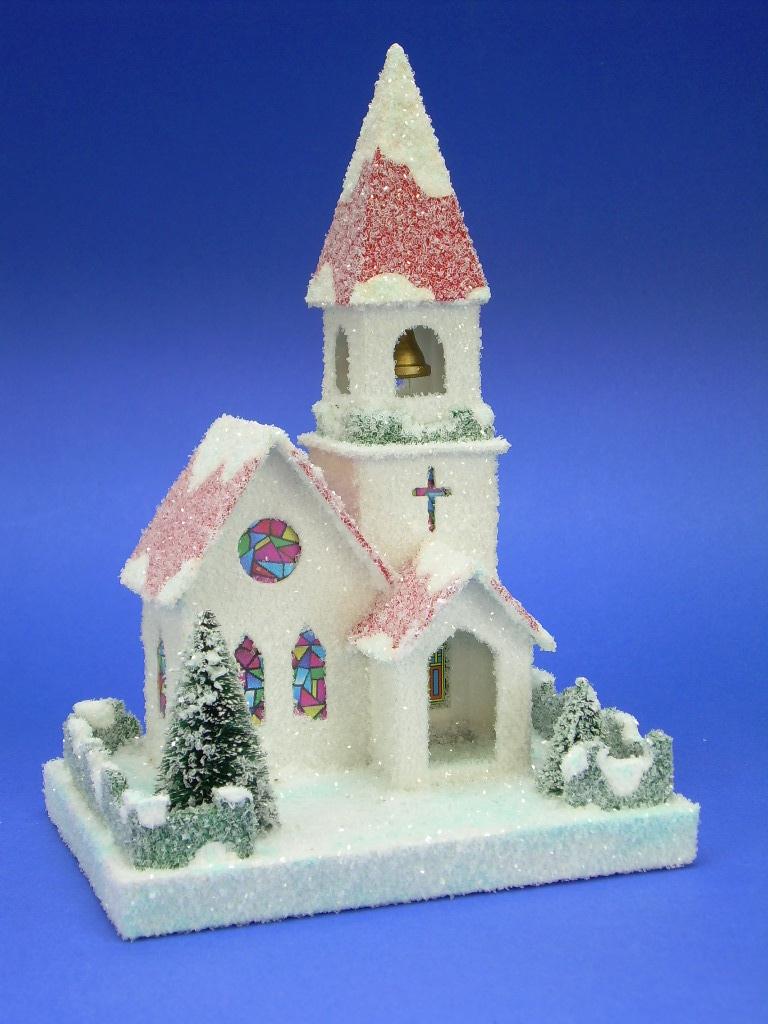
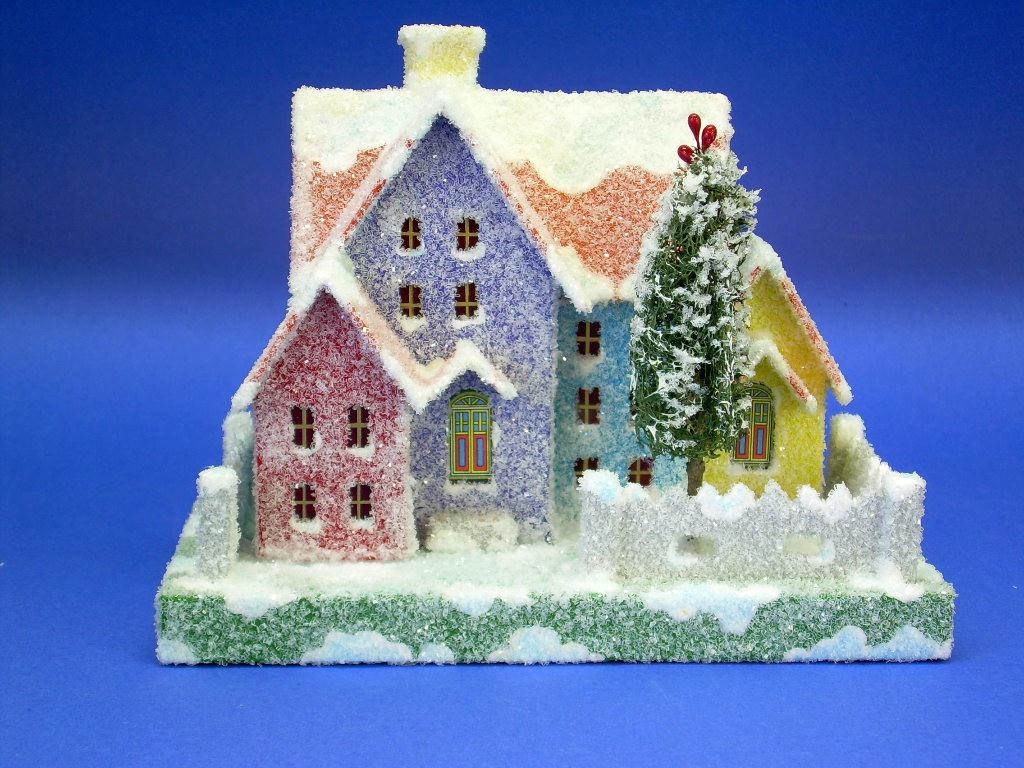
The finished project can be frosted to look right with "Christmas Villages," or left unfrosted for year-round use.
Note: If you've been using our other plans, you'll notice that we have changed our "pattern" by giving instructions for making the base AFTER you've made the lighthouse and keeper's cabin. Also, we don't provide measurements for the base on the "plan sheets." On this project, the size of your base is determined by the size of your lighthouse tower, and you can't know that until you've made that part.
What You Will Need
Your first ingredient for building cardboard houses is used, clean cardboard, such as cereal boxes, the backs of writing tablets, anything flat, firm and clean, that you can save.
The body is a section of paper mache or cardboard cone from a craft store. If you cannot find a suitable cone or you want to avoid another trip to the store, try "rolling your own" from cardboard, such as the kind that comes from cereal boxes.
In addition, for this project you'll need:
- A sharp mat knife or Xacto knife
- Elmer's white Glue-All. A glue stick would also come in handy.
- About a cup of sand. I use (new) aquarium or birdcage gravel, you can use "play sand," swimming pool filter sand or anything else with a texture and color you like.
- Several sheets of acid-free white bond paper
- A flat white paint that can be used to prime the base. Flat latex interior wall or ceiling paint is good. So is flat acrylic.
- Green acrylic or latex paint for the roof (optionally you can use burlap or a printed pattern)
- Tan paint to use as an undercoat for where the sand will be glued.
- Other paint as desired
- Materials for the fence. We used a bit of fence from a craft store, but spray-painted it brown and used straight pins to hold it in place. You could also make a fence with twigs, cardboard, foam core, or some other material. (You can see an example of a twig fence in our Barn and Silo project.)
- Some scraps of corrugated cardboard for the base
- Access to the Internet and a color printer (if you want to print a brick or stone pattern for the keeper's cottage)
- Vellum, celophane, or similar translucent medium, for the cottage windows and door
- Yellow flourescent craft paper to represent the glazing in the lighthouse door and windows.
- Some way to light the lighthouse and keeper's cabin. Battery powered is safer than electrically powered for this project. We used a battery-powered "tea light" for the lighthouse and a miniature LED lantern for the cabin. Refer to the drawings below for details.
For a more comprehensive list of tools and supplies that come in handy on any cardboard house project, please refer to our article What You Need to Build Glitterhouses.
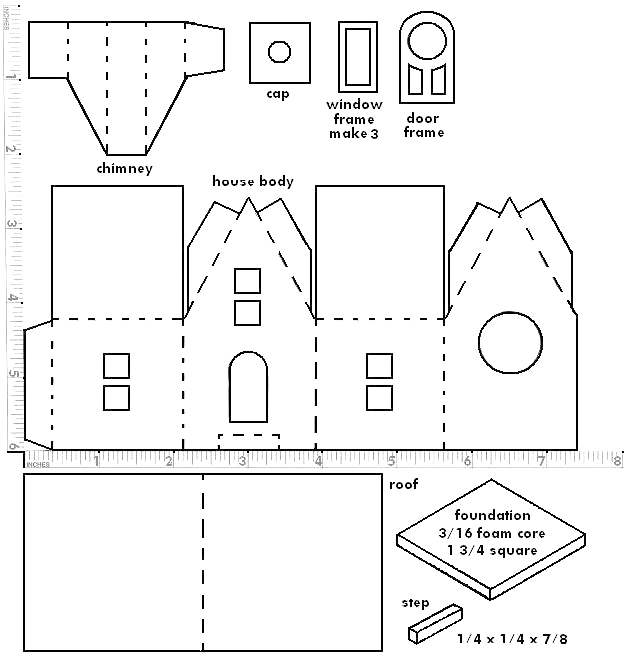
Print The Patterns
This project has a structure pattern that you print out and transfer to cardboard, as well as a texture sheet that you print out and use to finish your cottage's appearance.
You may print the structure pattern on any sort of paper, since you're simply using this to transfer the plan to your cardboard medium.
Printing the Plans - We've provided two versions to help you print the plans at the size you need.
- If you have Adobe Acrobat Reader on your computer:
- Click here to open the pdf version of the first sheet. Select the print option, tell it to "auto rotate and center" or whatever else you need to make it go to Landscape mode. Don't select the "scale to page" or "shrink to fit" option. Print.
- Click here to open the pdf version of the second sheet. This plan is not exactly to scale, so you don't have to worry if it prints at a slightly different size.
- Click here to open the pdf version of the third sheet. Like the second sheet, this plan is not exactly to scale, so you don't have to worry if it prints at a slightly different size.
- If you don't have Adobe Acrobat Reader on your computer or for some reason that doesn't work, click on the pattern illustrations above to open a big .jpg version of each pattern. Choose the "file, page setup" from your browser. When the page setup menu comes up, select "landscape mode." You should also disable the "print to fit" option if you have one.
If neither of those work, contact
Paul and ask him for help - that's his department. :-)
Printing the Patterned Paper - The stone and brick patterns used in this project are from the Big Indoor Trains™Building Texture pages. If you would like to try a different pattern, please check them out. In the meantime, the following patterns will give you the same graphics used in this project. Print each on acid-free bond paper at the highest quality setting your printer allows.
- Brick Pattern, as used on the walls of the brick cottage. (If you like the look of the project at the bottom of this page, you may prefer the Flagstone Siding.
- Optional: Rough cedar shakes or burlap may be used on the cottage roof instead of green paint if you wish.
Note: If you are interested in building for larger scales, you will find larger versions of the same patterns at the Family Garden Trains™Building Textures page.
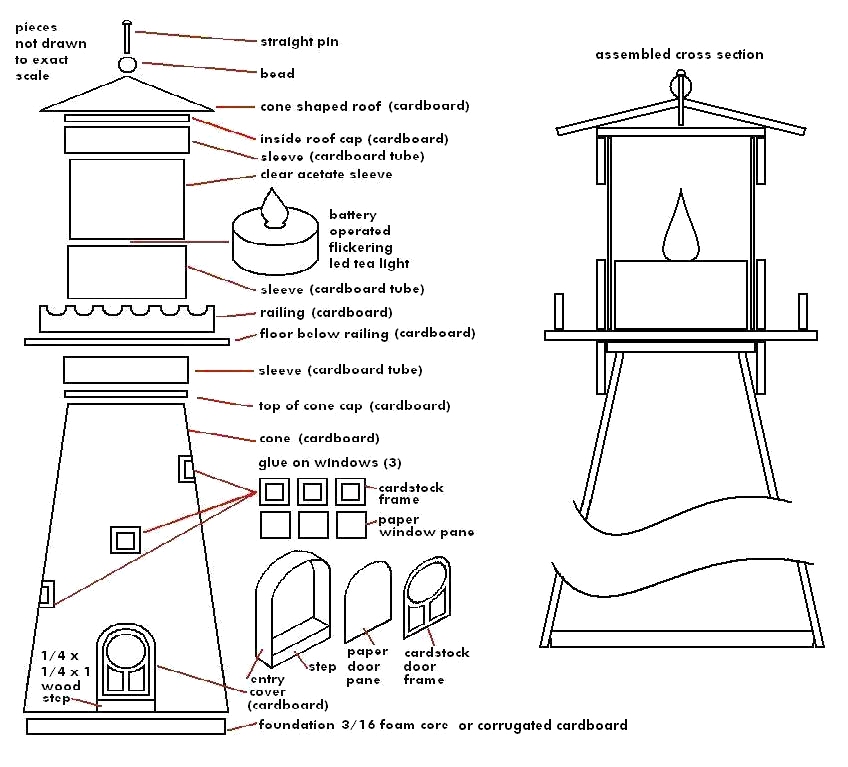
Building the Lighthouse Tower
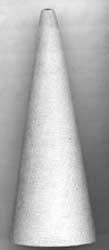 Make the body of the lighthouse from a section of paper mache or cardboard cone from a craft store. If you cannot find a suitable cone, try "rolling your own." It is a trial and error method and may take several times until you get the proper shape, taper and dimensions. Make the body of the lighthouse from a section of paper mache or cardboard cone from a craft store. If you cannot find a suitable cone, try "rolling your own." It is a trial and error method and may take several times until you get the proper shape, taper and dimensions.
When you're satisified with the shape and size, draw a circle around the base on some heavy corrugated cardboard. Then cut out the disk (cutting inside the lines just a bit) and use it to "plug" the hole at the bottom of the base. Punch or cut a hole in the middle of the disk in case you want to accommodate any lighting changes in the future (it may look like a huge washer when you're through). Then glue the disk in place to help stabilize the shape of the "tower" as you continue to work with it.
Make the Door and Window Frames
While you're waiting for the glue on the tower to dry, make the doors and windows. You can make all of them at once if you wish. However, the lighthouse doors and windows get a flourescent yellow insert before they're glued to the body of the lighthouse. The cottage doors and windows don't get "glazing" until after they are glued to the cottage walls.
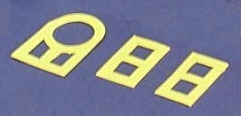
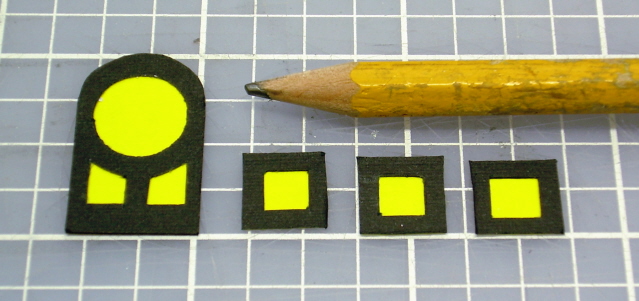
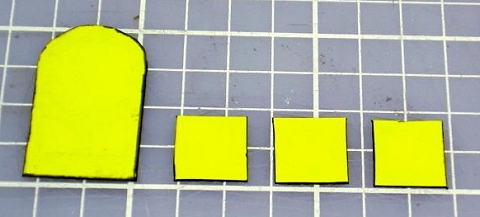
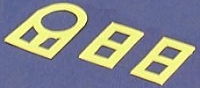 Cut the doorframes and windowframes from thin cardboard or cardstock. Measure carefully and cut out with an edge guide and a sharp blade. A small pair of cuticle scissors may be helpful. The photo to the right shows the door and windowframes for the keeper's cottage after they have been cut out and painted. Cut the doorframes and windowframes from thin cardboard or cardstock. Measure carefully and cut out with an edge guide and a sharp blade. A small pair of cuticle scissors may be helpful. The photo to the right shows the door and windowframes for the keeper's cottage after they have been cut out and painted.
Because your lighthouse cone may be a different size from mine, you may have to cut out several sets of doors and windows for that to get the best fit for your door and window openings.
- When you are satisfied, paint the frames your desired colors. Set the frames for the keeper's cabin aside.
- To give the impression of glowing windows on the lighthouse, glue flourescent yellow paper to the back of the lighthouse doors and windows. The photos below show the front and back of the lighthouse doors and windows after they've been "glazed" with yellor paper. Note that Howard has painted the outside edges all the way around to keep any yellow from showing where it shouldn't when they're mounted.
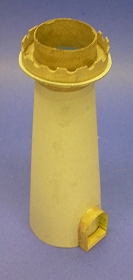 Building the Lighthouse Roof and Railings Building the Lighthouse Roof and Railings
The platform, railing, and roof of the lighthouse tower are cut from cardboard. You can use the plan printouts as guidelines, but you will have to experiment with them to get size right.
The best way to get the notches we show in the railing is to cut a srip of cardboard twice as high as the railing will be, then use a paper punch to punch a series of holes in the center of the strip. Then cut the strip in half.
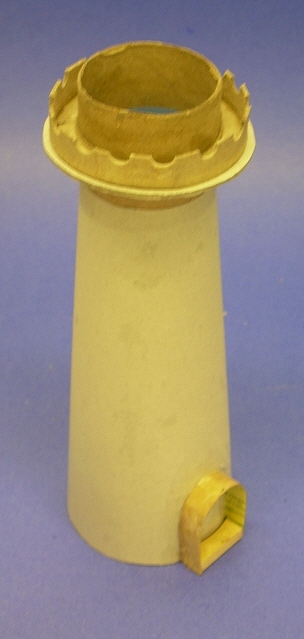
The photo to the right shows the platform and railing installed. A small arched doorway passage made of cardboard is also glued on.
Building the Keeper's Cottage
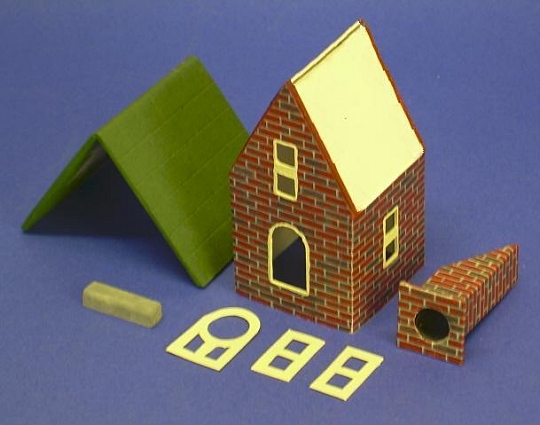
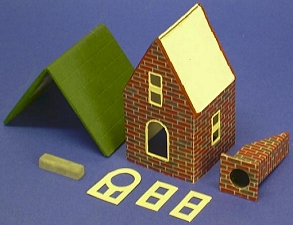 The photo to the right shows the results of the next several steps. You can click on it to see it larger. The photo to the right shows the results of the next several steps. You can click on it to see it larger.
Note: The process for cutting out and assembling the keeper's cottage is the same as the process for the "Stone Cottage" project. If you feel you need more detail or illustrations, please visit that project for more information.
Assemble the Cottage Walls
- Transfer the patterns to cardboard for the building.
- Score the fold lines of the walls and sub-roof, then cut out that piece and fold on the score lines. Fold the building temporarily into its finished shape to make certain the pattern has been transferred correctly.
- Unfold the building again and apply the printed stone or brick graphics. Only do a section at a time. Measure carefully, make crisp folds, apply glue and press in place.
- Trim the edges and cut the openings for the windows and door.
- Trim the edges of the graphic paper, if ncessary.
- You will see white edges of the paper that the graphics are printed on when you cut pieces to fit various surfaces. With a felt-tip pen,
 marker, or acrylic paint and a very tiny brush, carefully coat just the edge of paper if needed. marker, or acrylic paint and a very tiny brush, carefully coat just the edge of paper if needed.
- Glue the building together, using paperclips or clothespins to keep it in place until the glue is completely dry.
- Paint the inside edges where the door and windowframes will go.
Building the Cabin Roof
- Transfer the roof pattern to the cardboard, but cut it out oversized, a half inch all around. For this project, I used a piece of very thick, soft cardboard that I indented in a "shingle pattern" by using a straight edge and a dull point (a knitting needle would do the job). Then I painted it a dull green. Alternatively you could use a printed pattern such as the Rough Cedar Shake pattern for the roof.
- If you've used a printed pattern, wait until the glue is completely dry. Then score the roof peak fold line on the underside of the cardboard.
- Set the roof on the cottage temporarily to make certain it looks the way you want it to. Then trim the roof piece to the final dimensions you want.
- Paint the underside of the roof's overhang and edges. If you are planning to paint the top of the roof, paint it now.
Building the Chimney and Cap
- Transfer the pattern for the chimney and cap to cardboard.
- Score fold lines, cut out the pieces and fold on the score lines
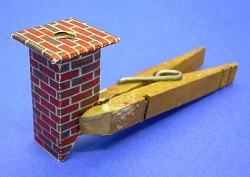 Apply the printed stone (or brick) graphics. Only do a section at a time. Measure carefully, make crisp folds, apply a thin layer of glue, and press in place. Apply the printed stone (or brick) graphics. Only do a section at a time. Measure carefully, make crisp folds, apply a thin layer of glue, and press in place.
- Glue the chimney together. When all of the glue is dry, glue the cap onto the chimney.
- The white edges of the paper may show. With an appropriate color felt-tip pen, marker or acrylic paint and a very tiny brush, carefully coat just the edge of paper and touch up as needed.
Assembling the Cabin
- Glue the windows and doors to the house body.
- Glue the roof to the house body.
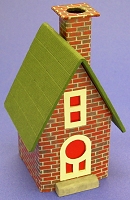 Glue on the door and window frames. Glue on the door and window frames.
- Glue your window material inside of house.
- Glue on the chimney and the porch roof.
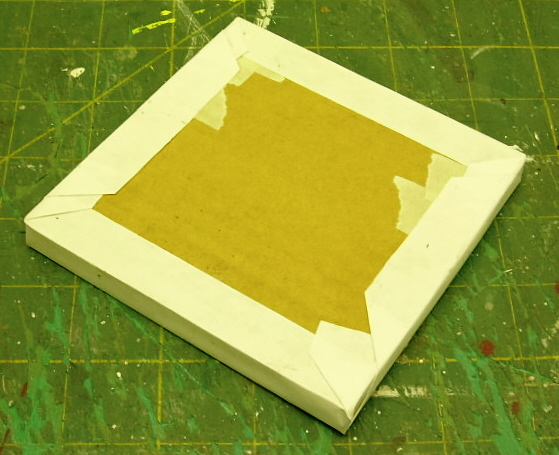
Building the Base
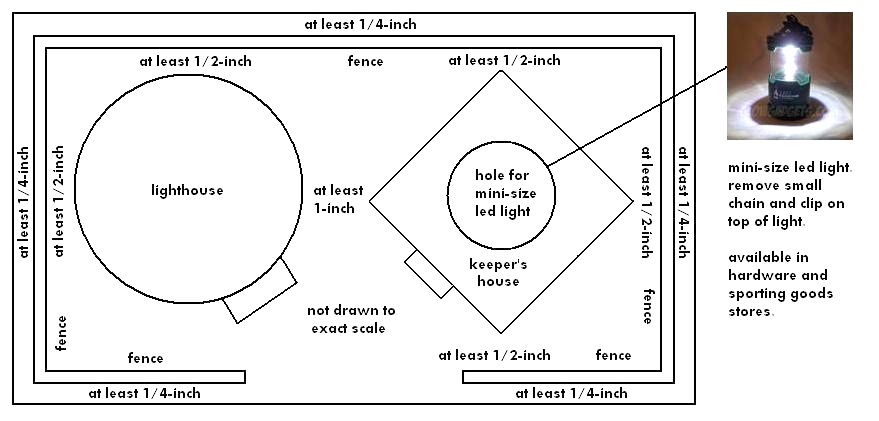
The base is a rectangular "box" that is decorated before the building and fence are installed. On this project, you should figure out the dimensions AFTER you've built the lighthouse and keeper's cottage.
- To get the dimensions, set the lighthouse and keeper's cottage on a piece of paper or cardboard. Arrange them the way you want. Then, using the third plan sheet as a guideline only, sketch out a "border" around them both that leaves at least an inch all the way around. Finally use a square to "true" up the shape of the base.
- Once you have your dimensions, make the base from four layers of corrugated cardboard glued together in a sandwich.
- Wrap and glue a strip of cereal-box cardboard all around it to camouflage the rough edges of the corrugated cardboard.
 When the base is built, you then cover it with white bond paper just like you would wrap a gift, except that all surfaces of the paper cover must be glued down to the box. A glue stick works great for this. When the base is built, you then cover it with white bond paper just like you would wrap a gift, except that all surfaces of the paper cover must be glued down to the box. A glue stick works great for this.
Note: For more information about building bases for vintage-style cardboard houses, please see our Glitterhouse Bases article.
- If you want to use a minature led lantern to illuminate the house like we did, you may build a "base" for that and cut out part of the base to provide room for it, as shown in the photo below.
- When the glue has dried, apply a coat of white primer and let it dry.
When that coat is dry, add a layer of beige or sand color that complements the sand you are going to use.
If you 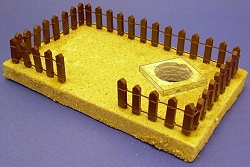 are going to add a fence made of cardboard or foam core board, add it and paint it before you add the sand (below). If you are going to use a prebuilt fence like we did, wait until after you add the sand. are going to add a fence made of cardboard or foam core board, add it and paint it before you add the sand (below). If you are going to use a prebuilt fence like we did, wait until after you add the sand.
- When that paint is dry, coat the top and sides of the base with white glue, then sprinkle on the sand. Press the sand into the glue a little and make sure there aren't any major "holes" in coverage. Let it dry.
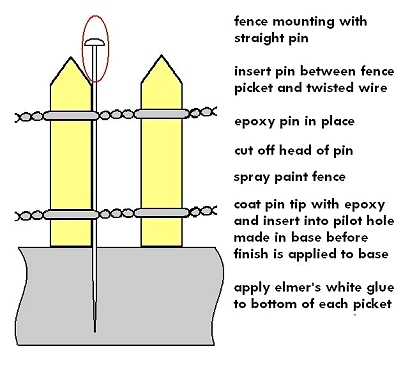
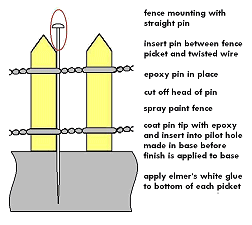 If you are adding a prebuilt fence like we did, spraypaint the fence with brown paint (or rust primer, if you want to give it a "snow fence" look). Then when it has dried, use straight pins to fasten the fence to the base as shown in the drawing to the right. (Click on the drawing for a bigger picture.)
finished_base_back_view_small.jpg If you are adding a prebuilt fence like we did, spraypaint the fence with brown paint (or rust primer, if you want to give it a "snow fence" look). Then when it has dried, use straight pins to fasten the fence to the base as shown in the drawing to the right. (Click on the drawing for a bigger picture.)
finished_base_back_view_small.jpg
Finishing Details
Glue the house, front step, and fence to the base. You can add a little or a lot of snow and frost as you desire:
- Optional “Hint of Frost/Light Snow“ Details -
If you wish to give this project a little more "seasonal" flavor, you may add a “hint of frost/light snow” to the roof, fence, and base.
To protect the graphic pattern, roof, and base from dust and UV damage, consider applying several light coats of clear satin spray on the entire project.
- Optional "Heavy Snow Details - If you wish to give your project a mid-winter appearance, you can dab white paint on parts of the roofs and fences. When that has dried, spread a thin layer of "white glue" (like Elmer's) over the white paint, then apply clear glitter. When the glue has dried, hold the building upside down and tap it to dislodge excess glitter. Now, apply glue and glitter to the base.
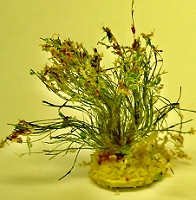 Finish with the figures, accessories, or add-in trees of your choice. We added sea grass from our Sea Grass craft project. Finish with the figures, accessories, or add-in trees of your choice. We added sea grass from our Sea Grass craft project.
Conclusion
Now that I'm in "retirement," this hobby has become a sort of avocation for me. Several folks have commissioned me to build specific houses for them. So if you'd like me to "bid" on a cardboard house for you, or if you have any questions at all, please use this link, and Paul will forward your information to me.
Also, if you have a similar project you'd like to share with your fellow readers and hobbyists, we'd love to add it to our site, and we'll be sure to give you full credit for your contribution.
Return to Howard's How-To's
|


|